( It will be necessary to create your "Paypal Donations ID" and your "Paypal Client ID" accounts )
Paypal website link : https://www.paypal.com
If the Paypal "Donations" account is an option that you can use or not according to your choice,
we strongly advise you to create your Paypal "Client_ID" in order to receive up to 100% of your sales!
However, by default the Paypal "Client_ID" set for your account is the one of this website.
If you do not change it by following the instructions below, we can pay you the amount
of your sales once a month for a management fee of 20% (to which will be added the various
commissions requested by Paypal) and provided that the cumulative amount of your sales reaches $250 / 250 €.
When you are logged in your Paypal account, follow the next steps in order to create your Paypal Client ID
First open the Paypal Developer link : https://developer.paypal.com
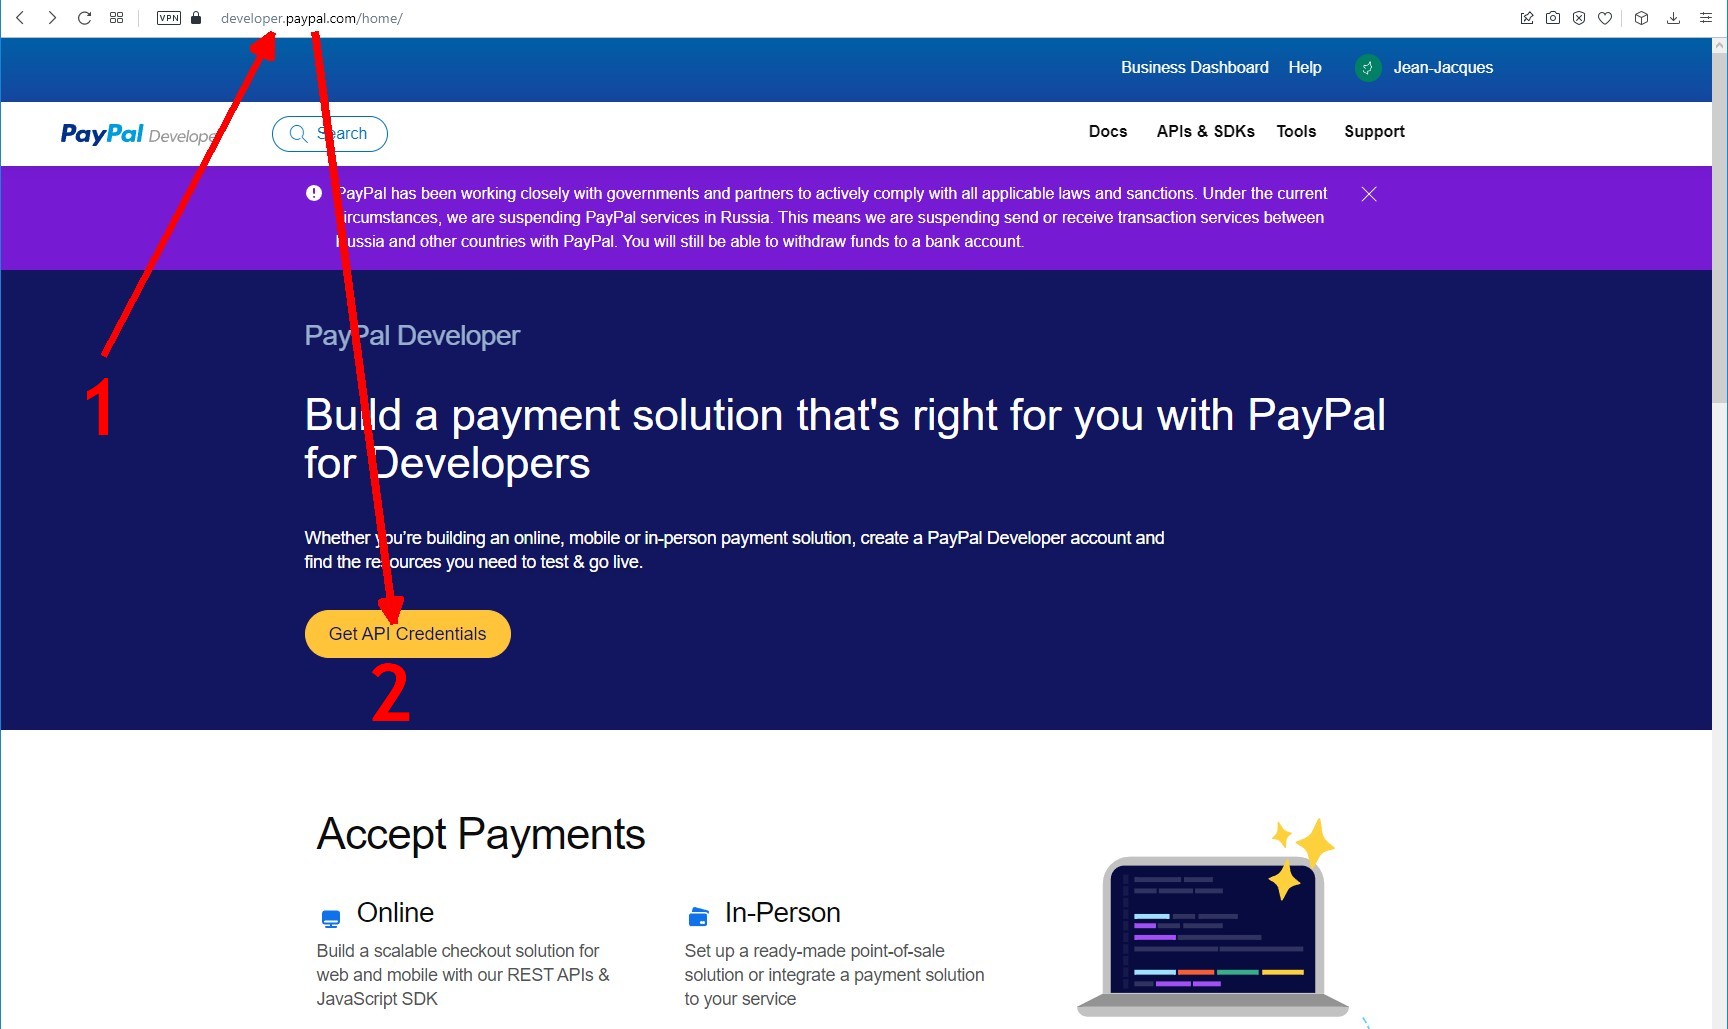
1) Be sure you are on the https://developer.paypal.com Paypal page
2) Click on the "Get API Credentials" button
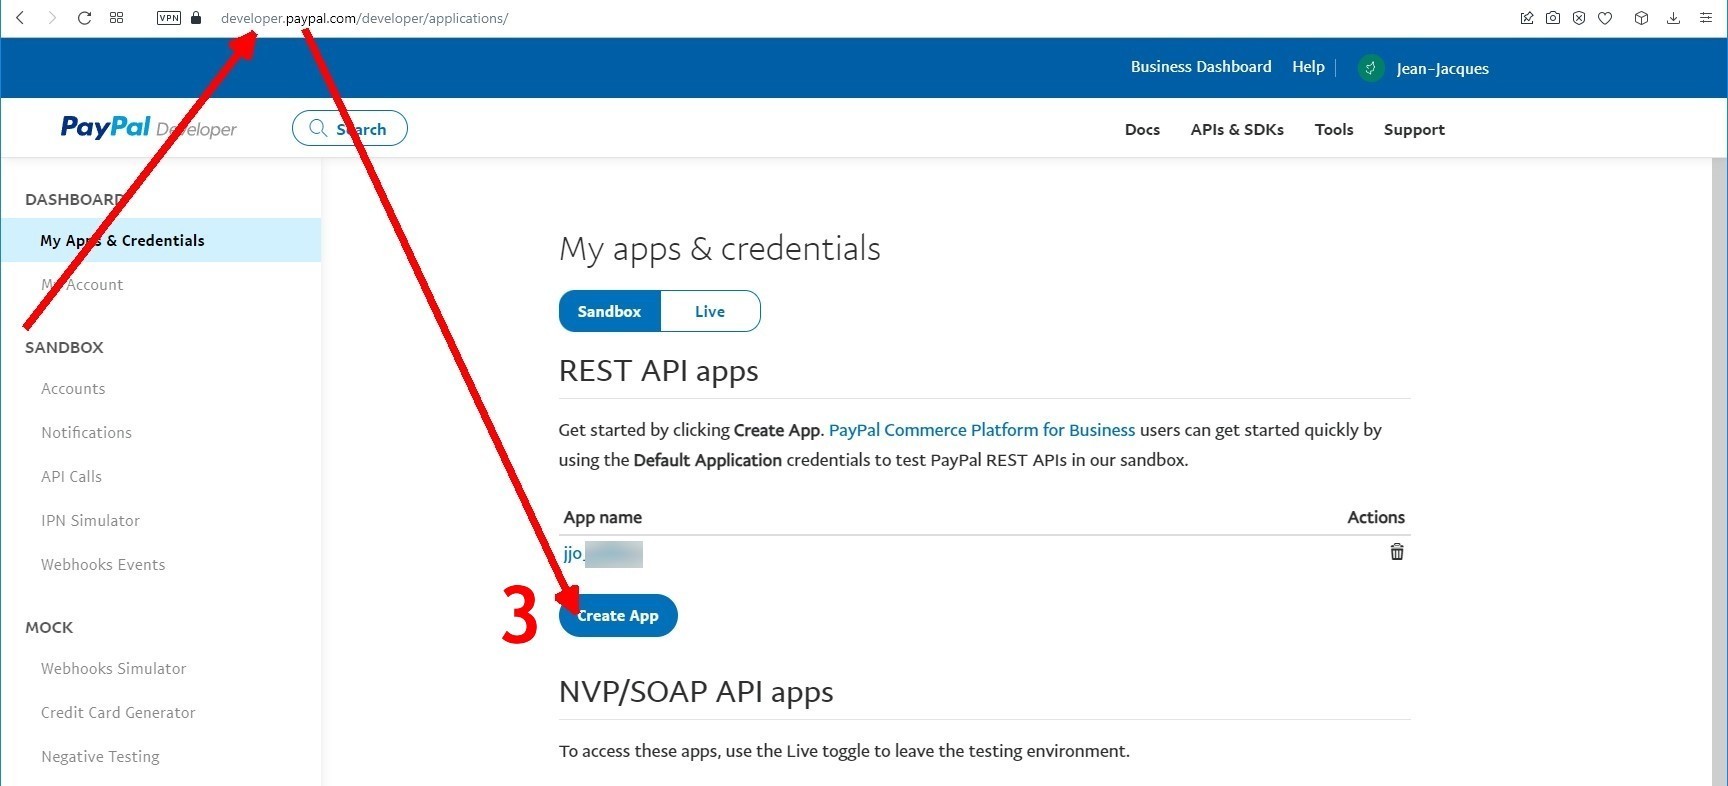
3) Click on the "Create App" button
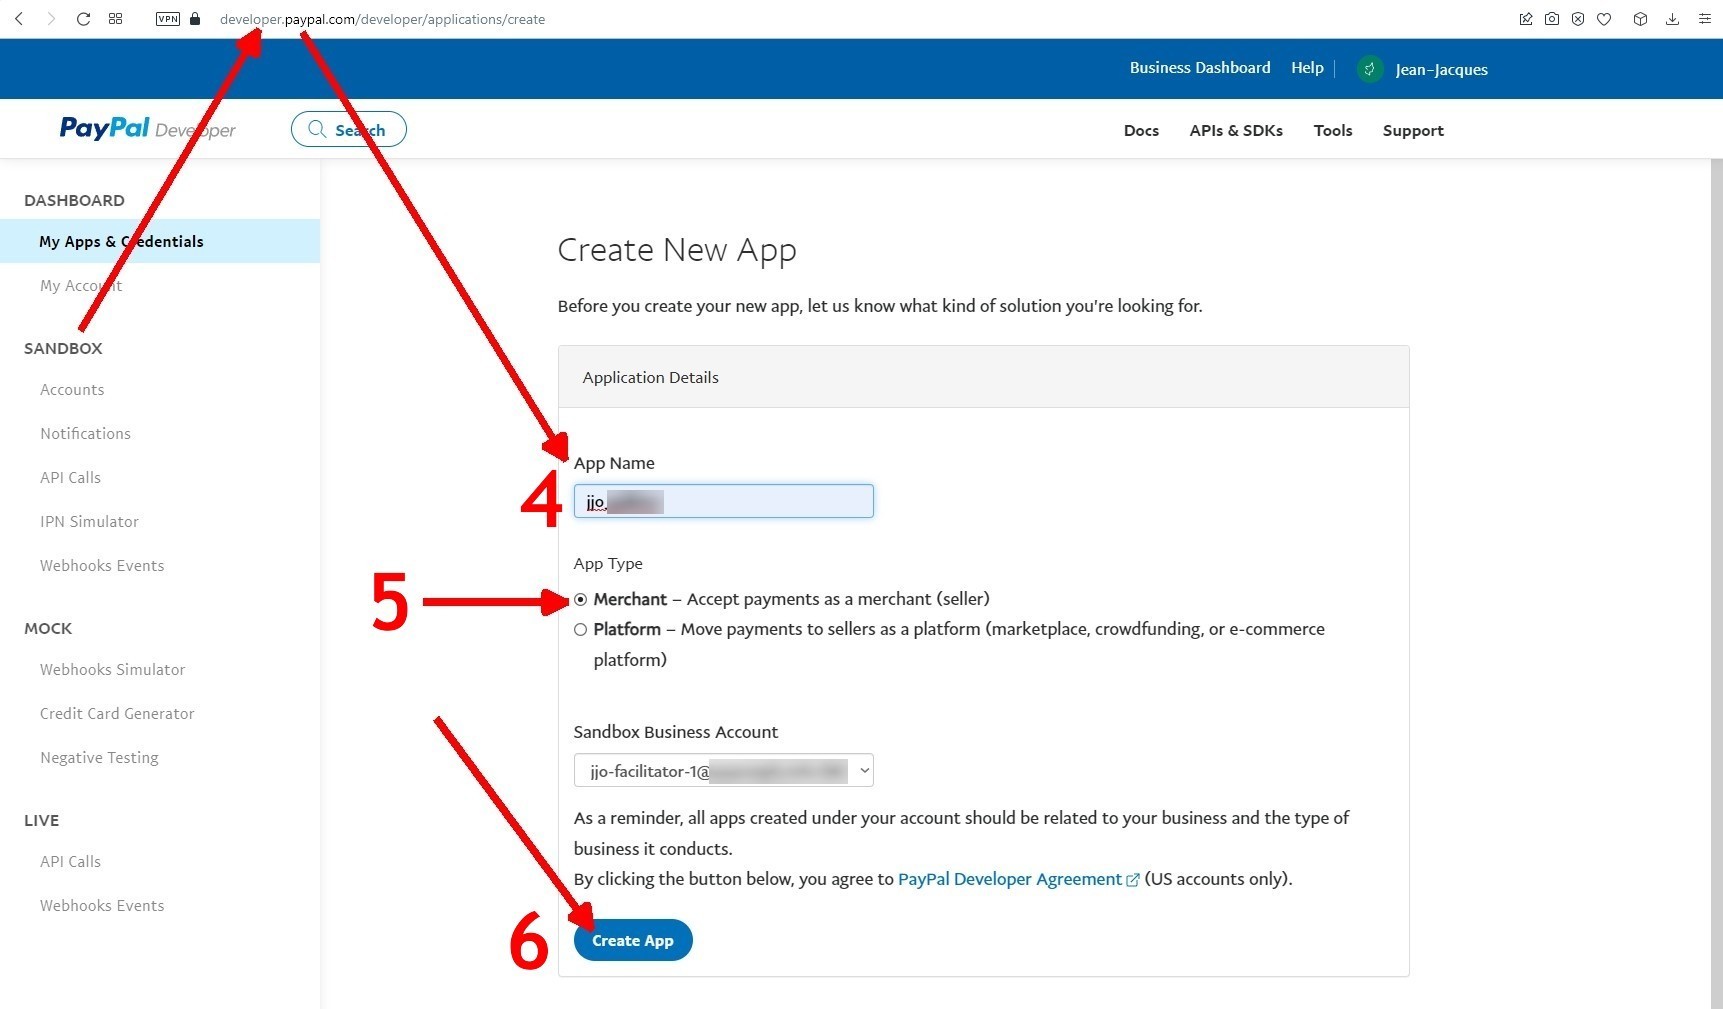
4) In the "App Name" zone, set a name to create a "New Application Name"
5) Click on the "Merchant" option
6) Click on the "Create App" button
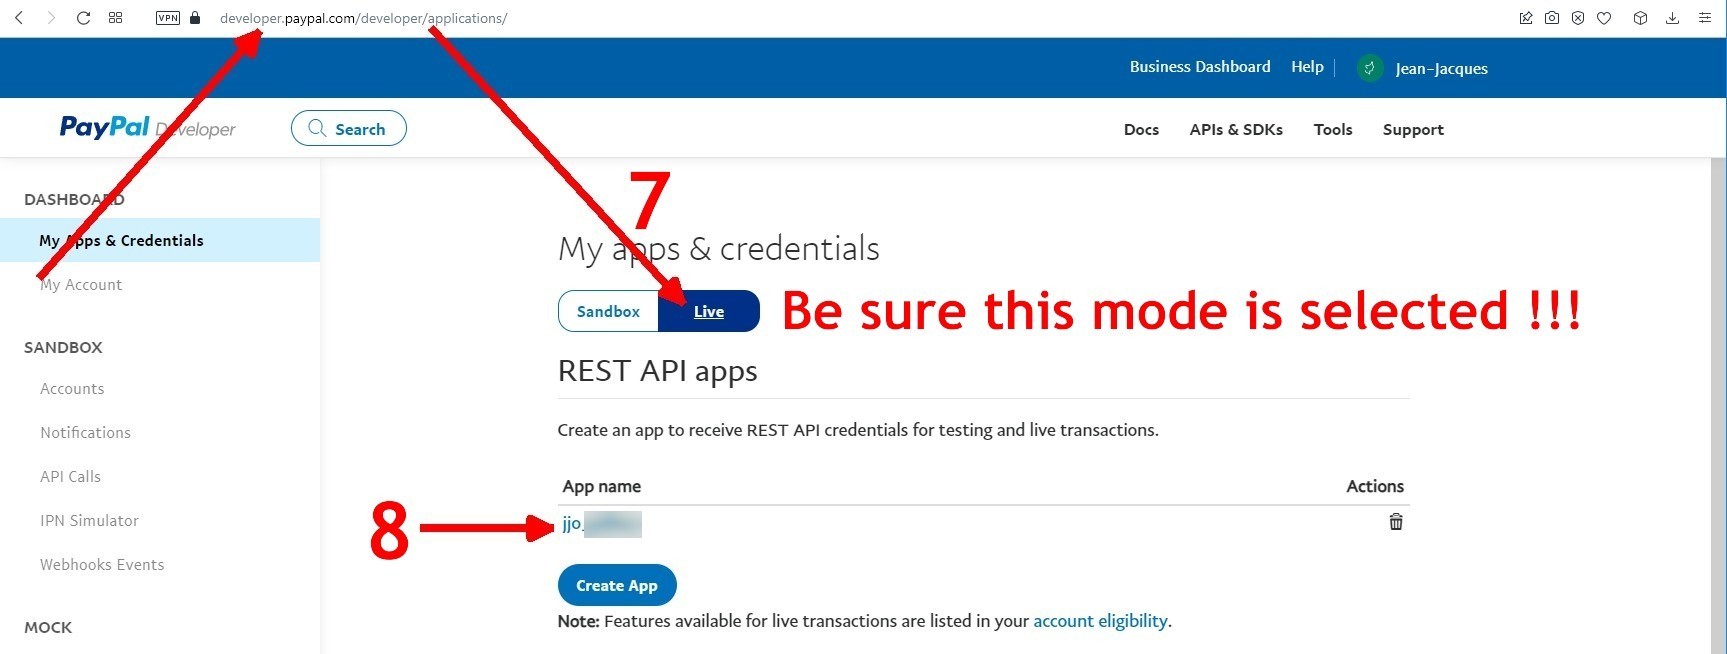
8) In the "App name" zone click on the "New Application Name" you set just before
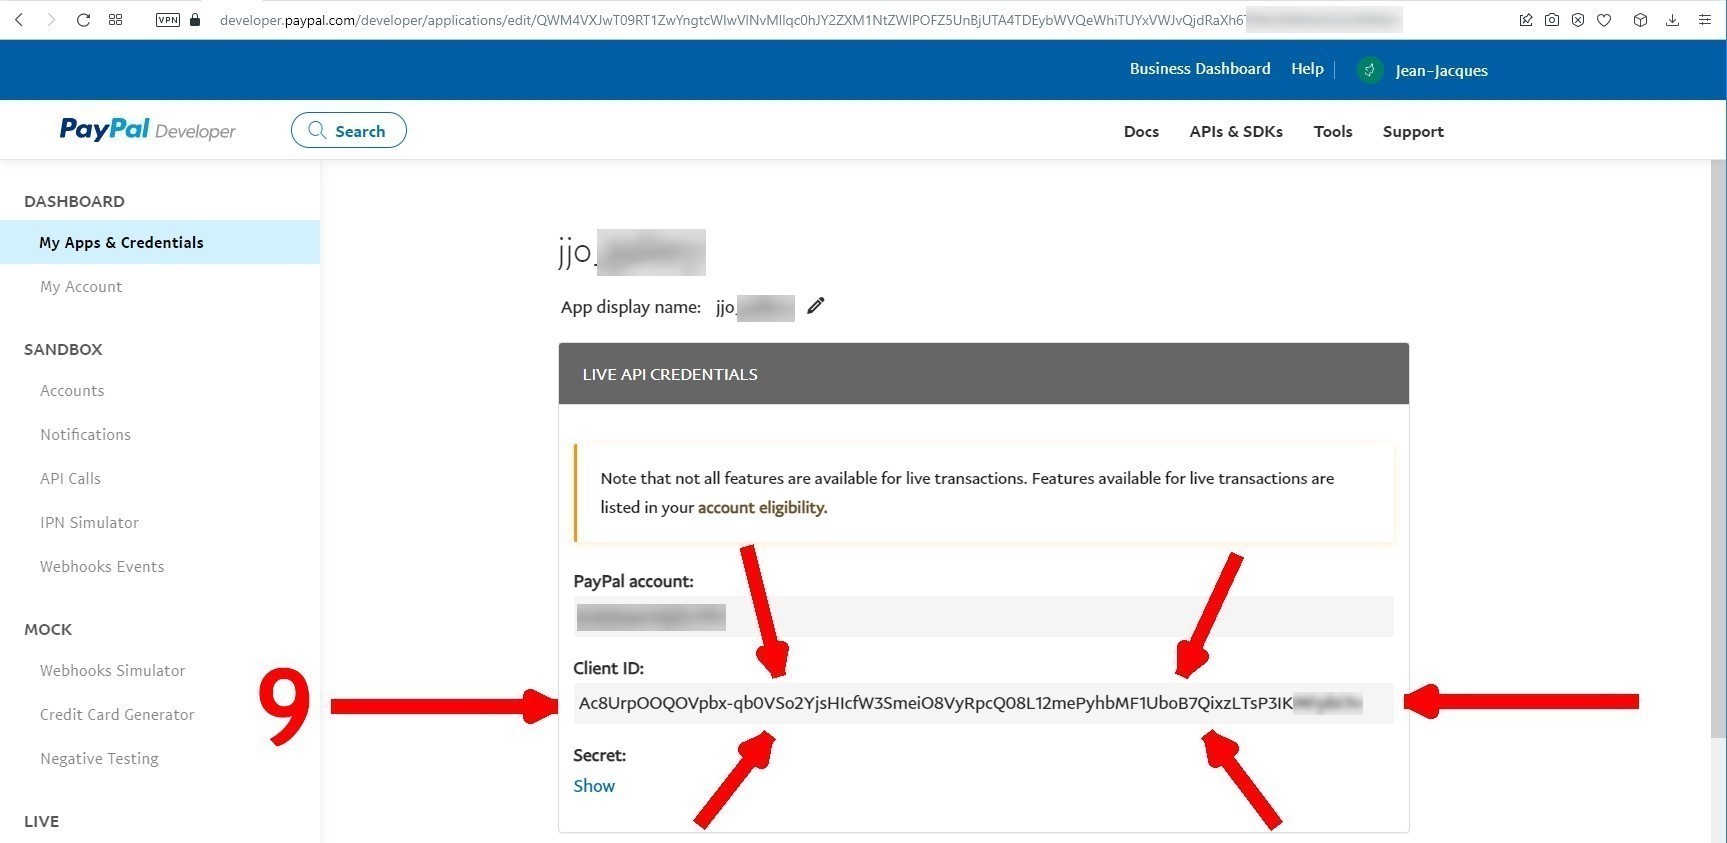
9) When all of these steps are done, the Client ID above in this last screen copy will be your "Paypal Online Key ( sdk > js > clienid )"
You need to copy it and paste it in the same zone in your ART Gallery parameters page ( see point 10 below )
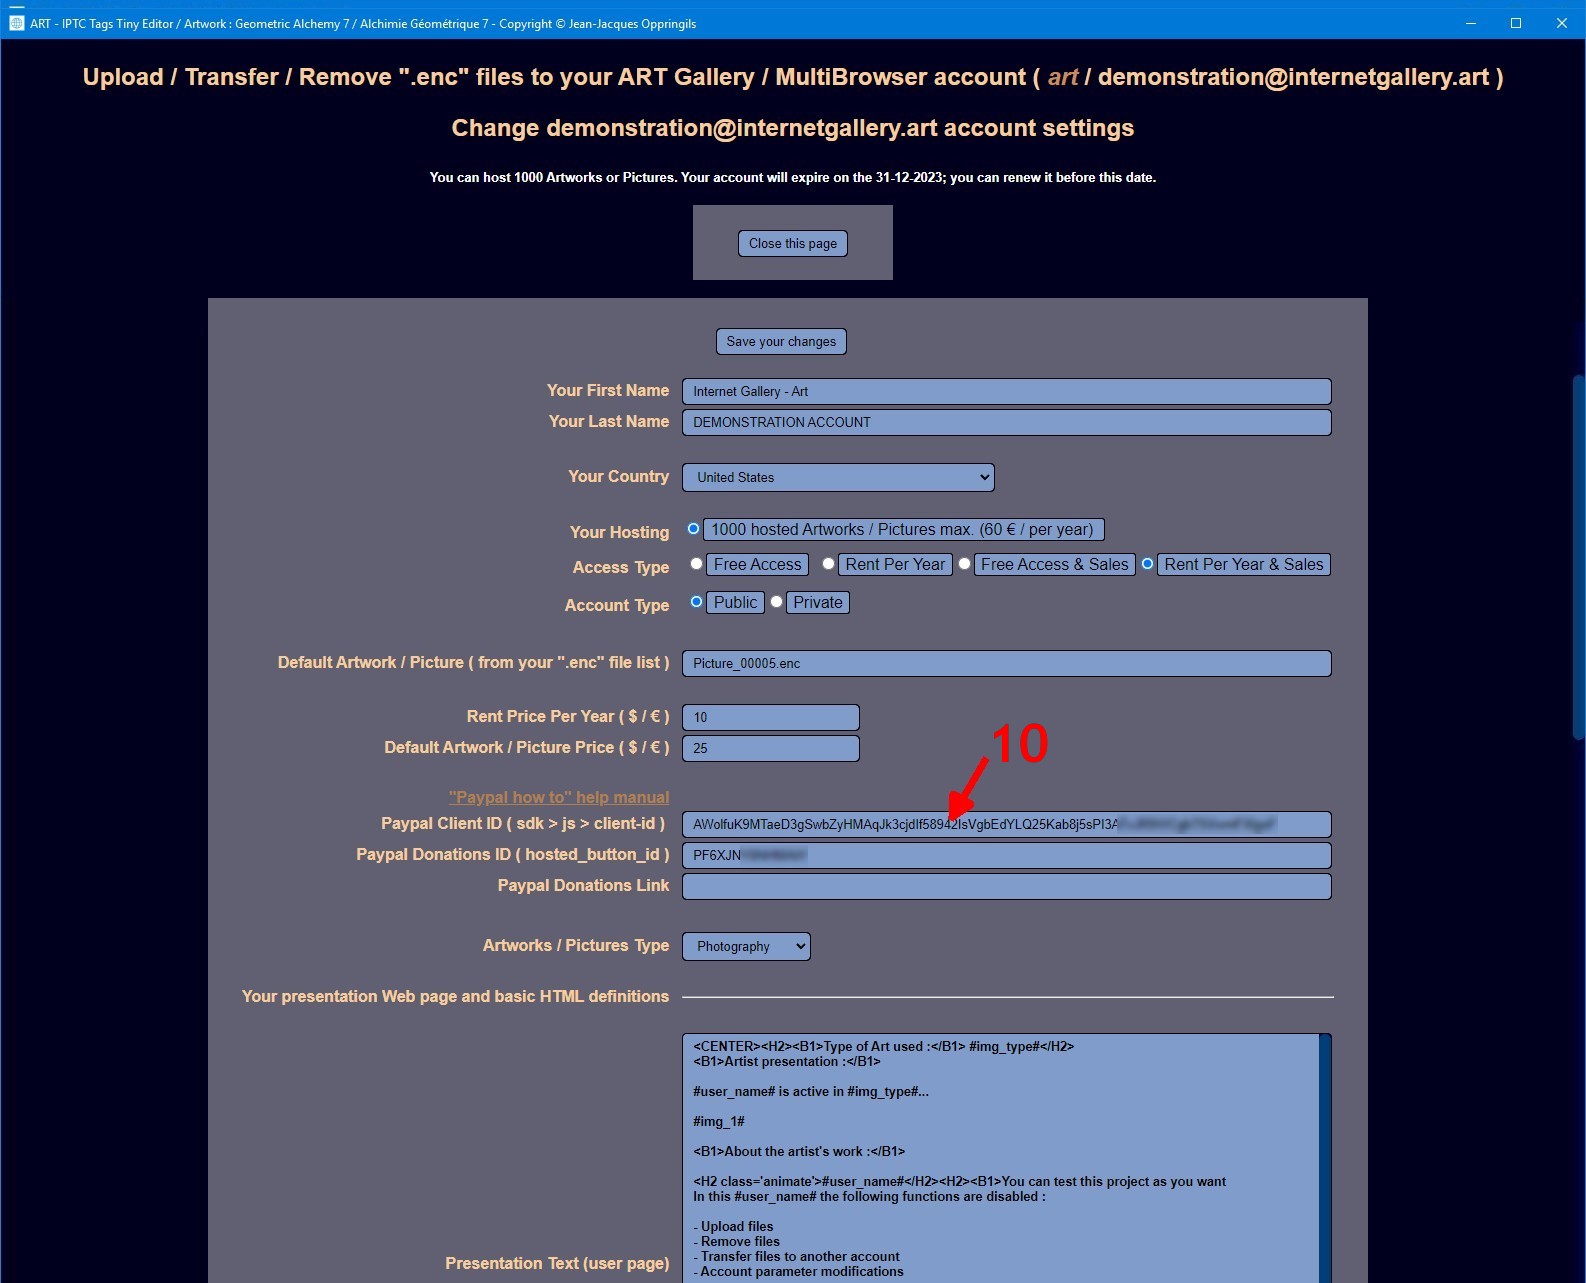
10) You need to copy your "Paypal Online Key ( sdk > js > clienid )" and paste it in this zone in your ART Gallery parameters page
When you are logged in your Paypal account, follow the next steps in order to create your Paypal Donations ID

We suggest you to set the language of the Paypal pages in English.
To do that, go to the bottom of the first Paypal page and click on the English option.
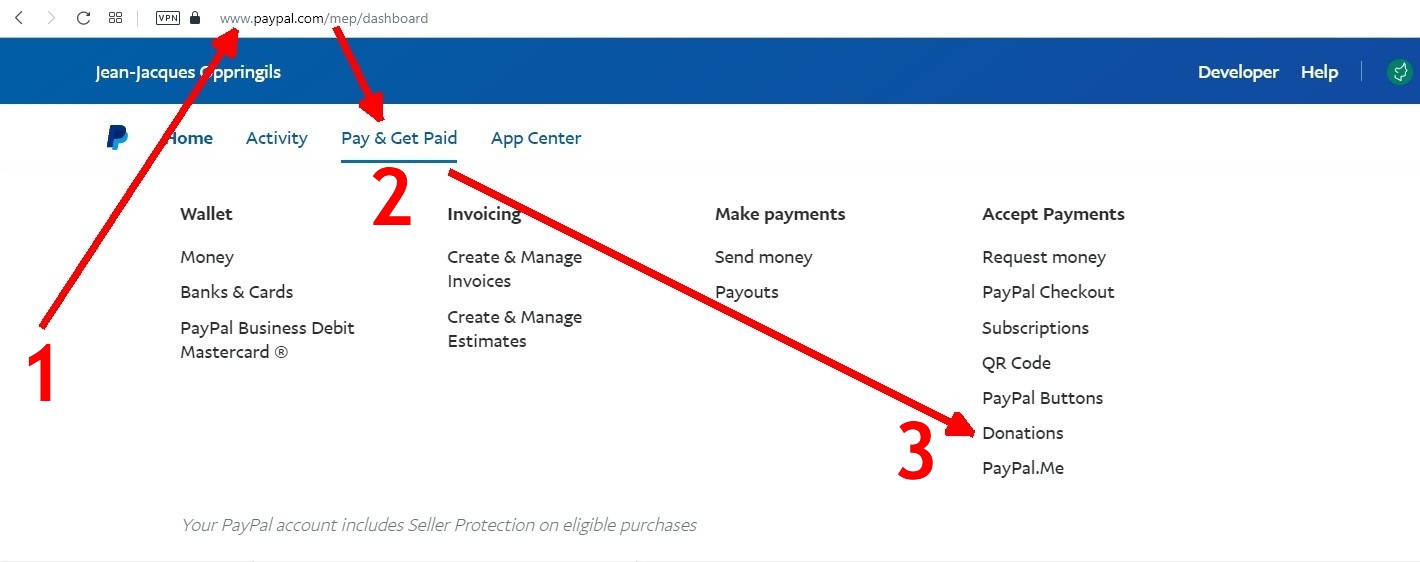
1) Be sure you are on the first Paypal page
2) Click on the "Pay & Get Paid" option
3) Click on the "Donations" option
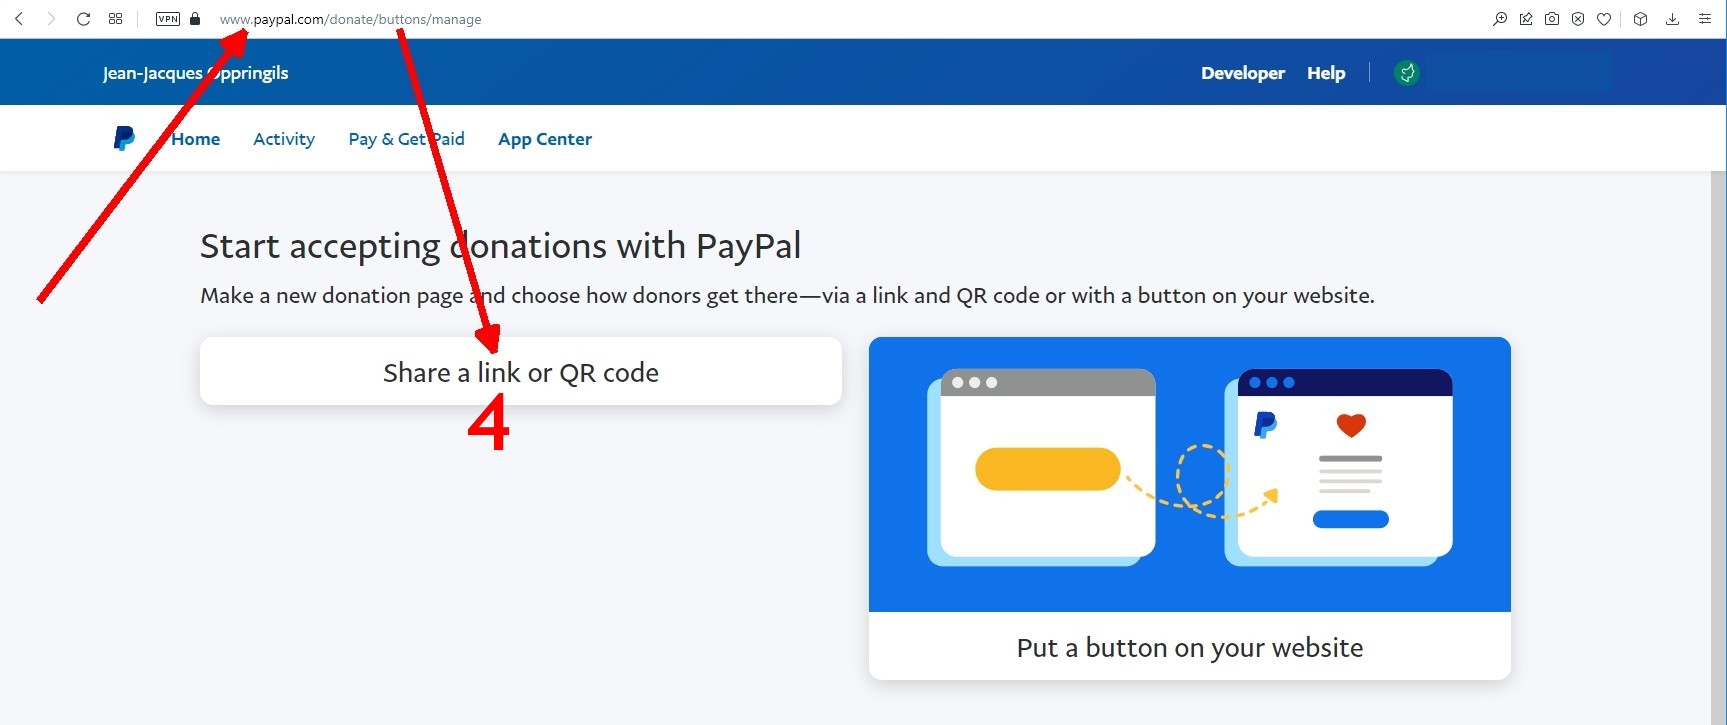
4) Click on the "Share a link or QR code" option
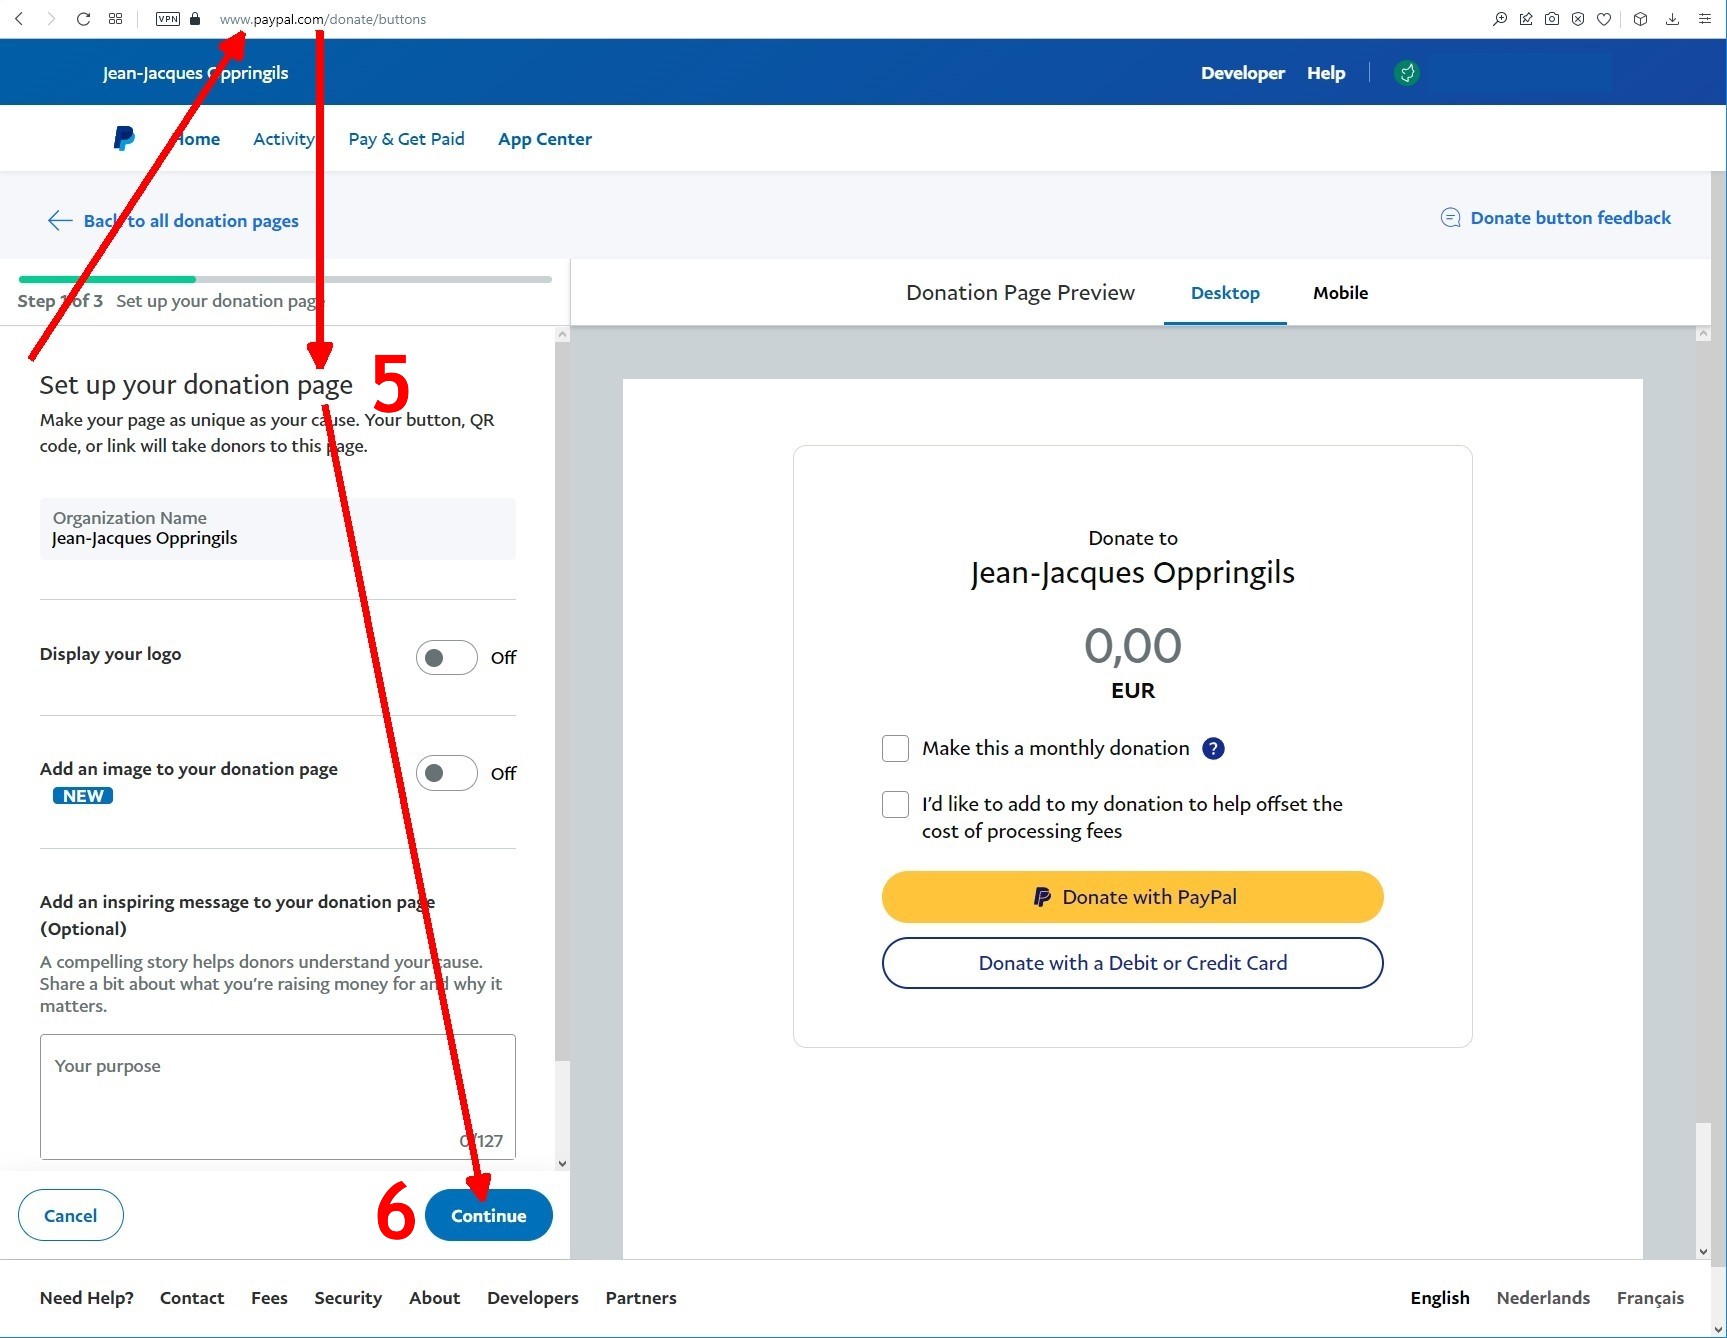
5) Set up your donation page
6) Click on the "Continue" button
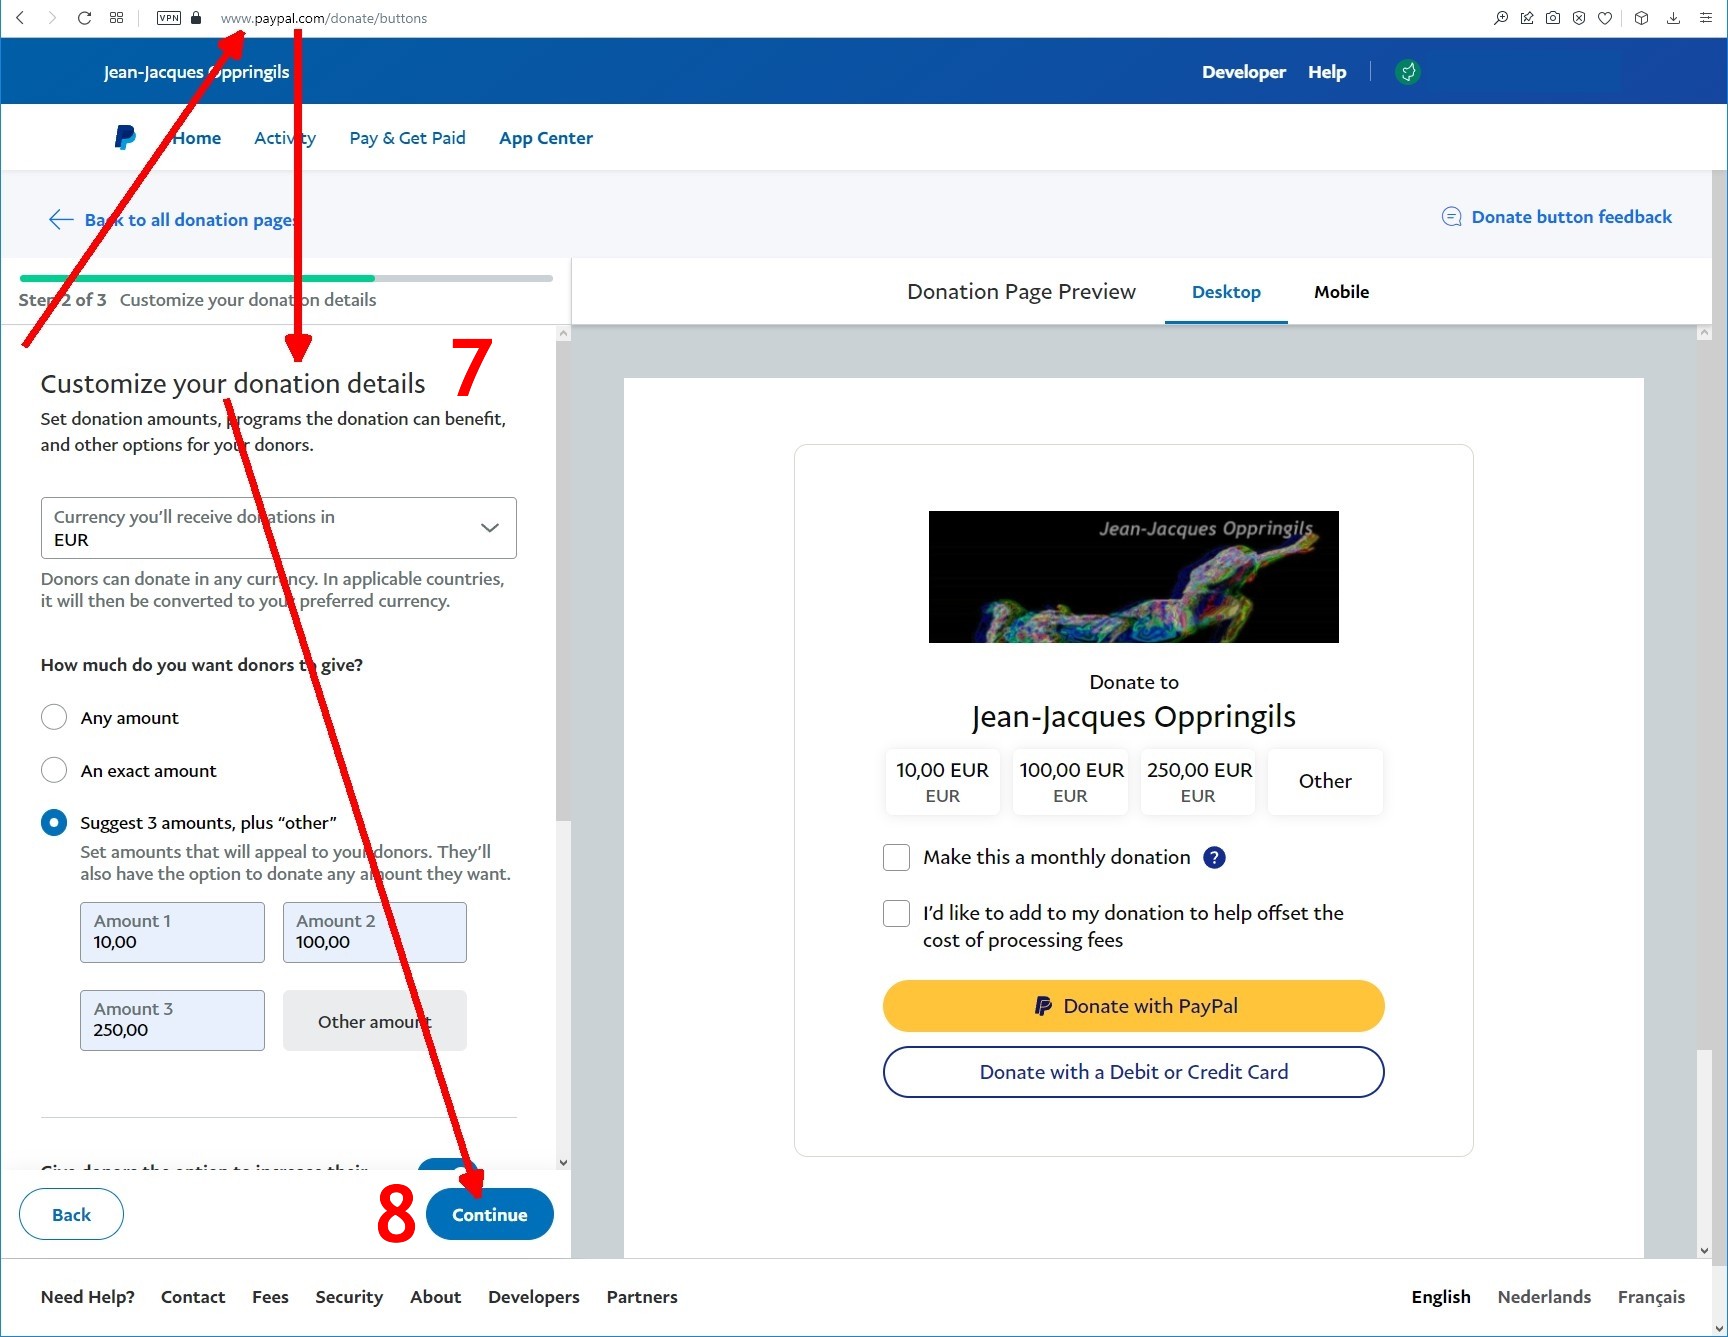
7) Customize your doantion details
8) Click on the "Continue" button
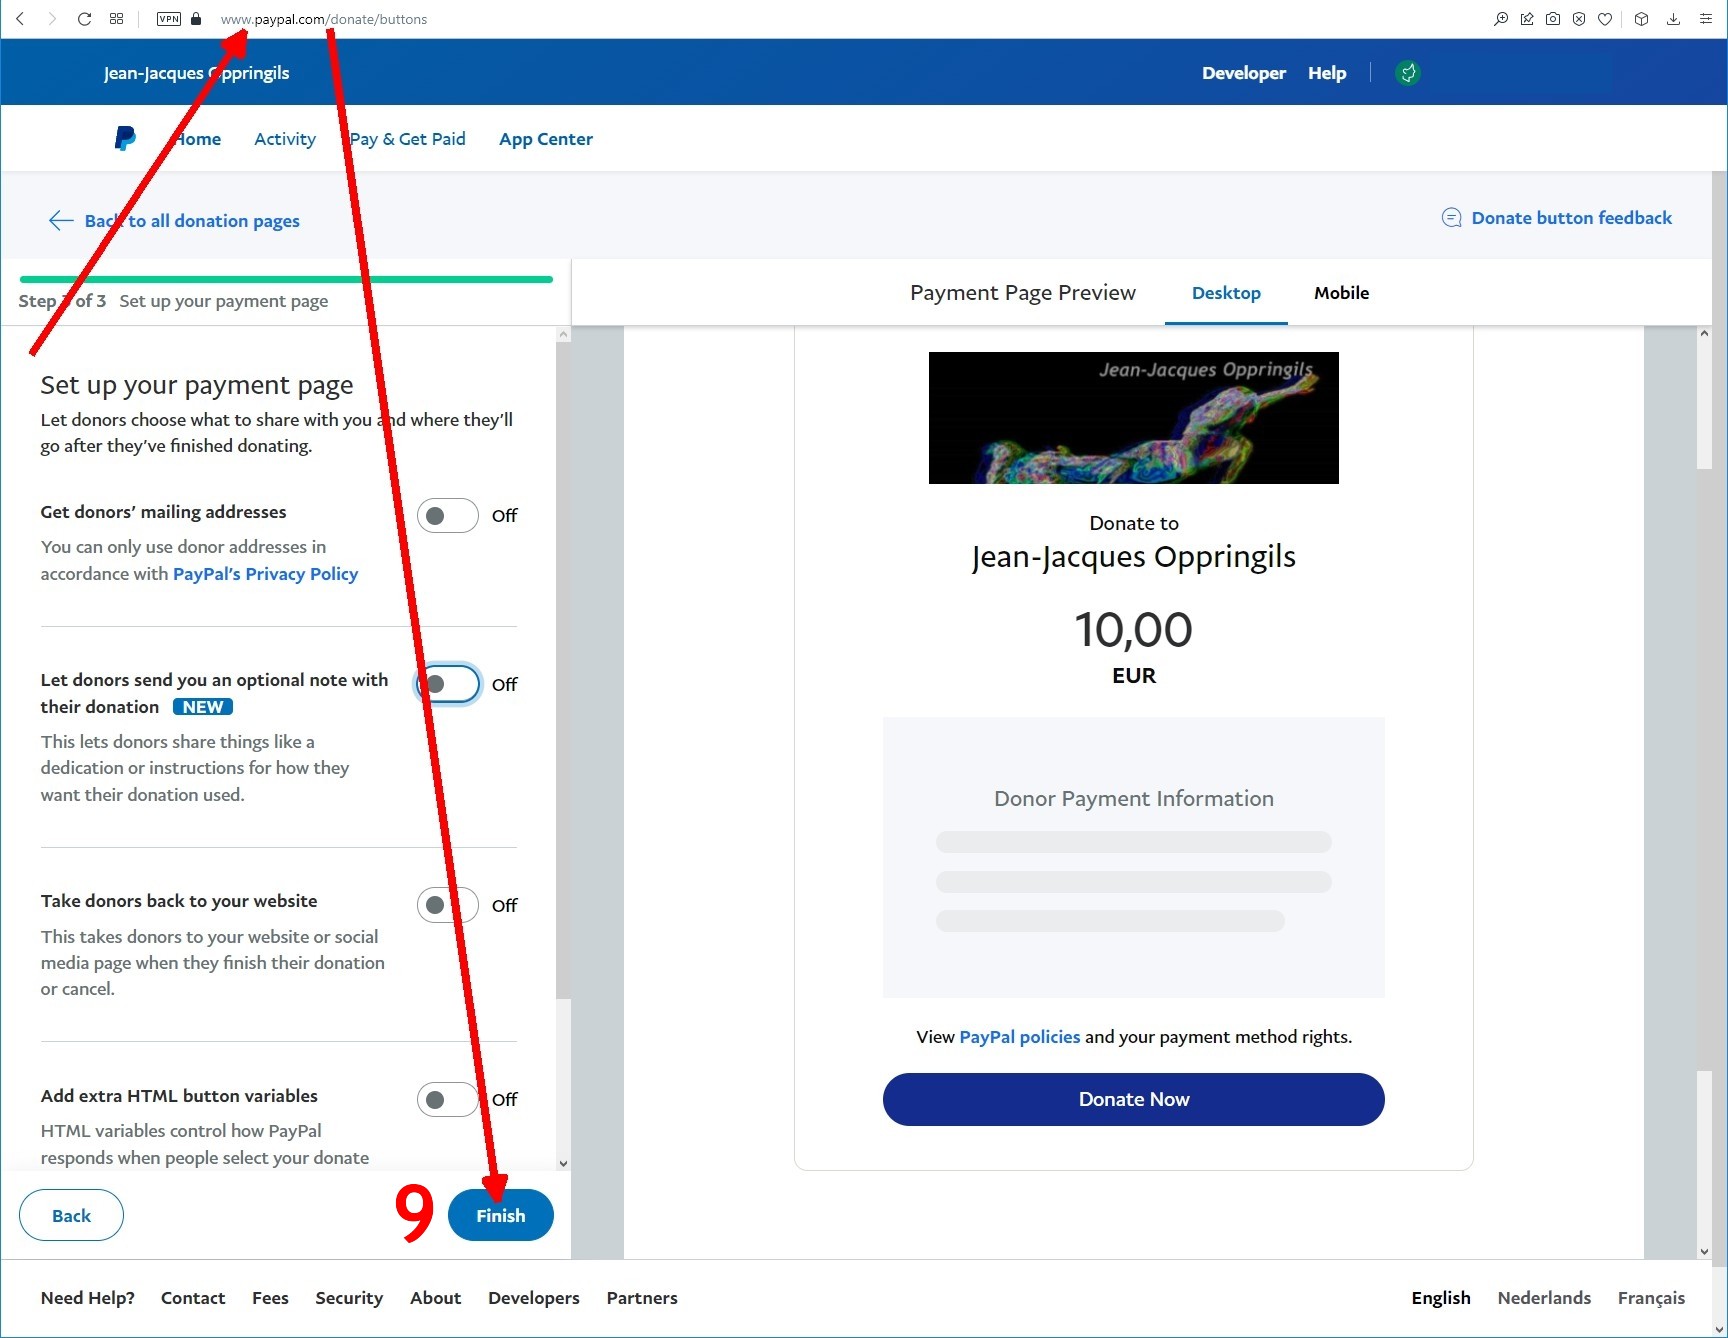
9) Click on the "Finish" button
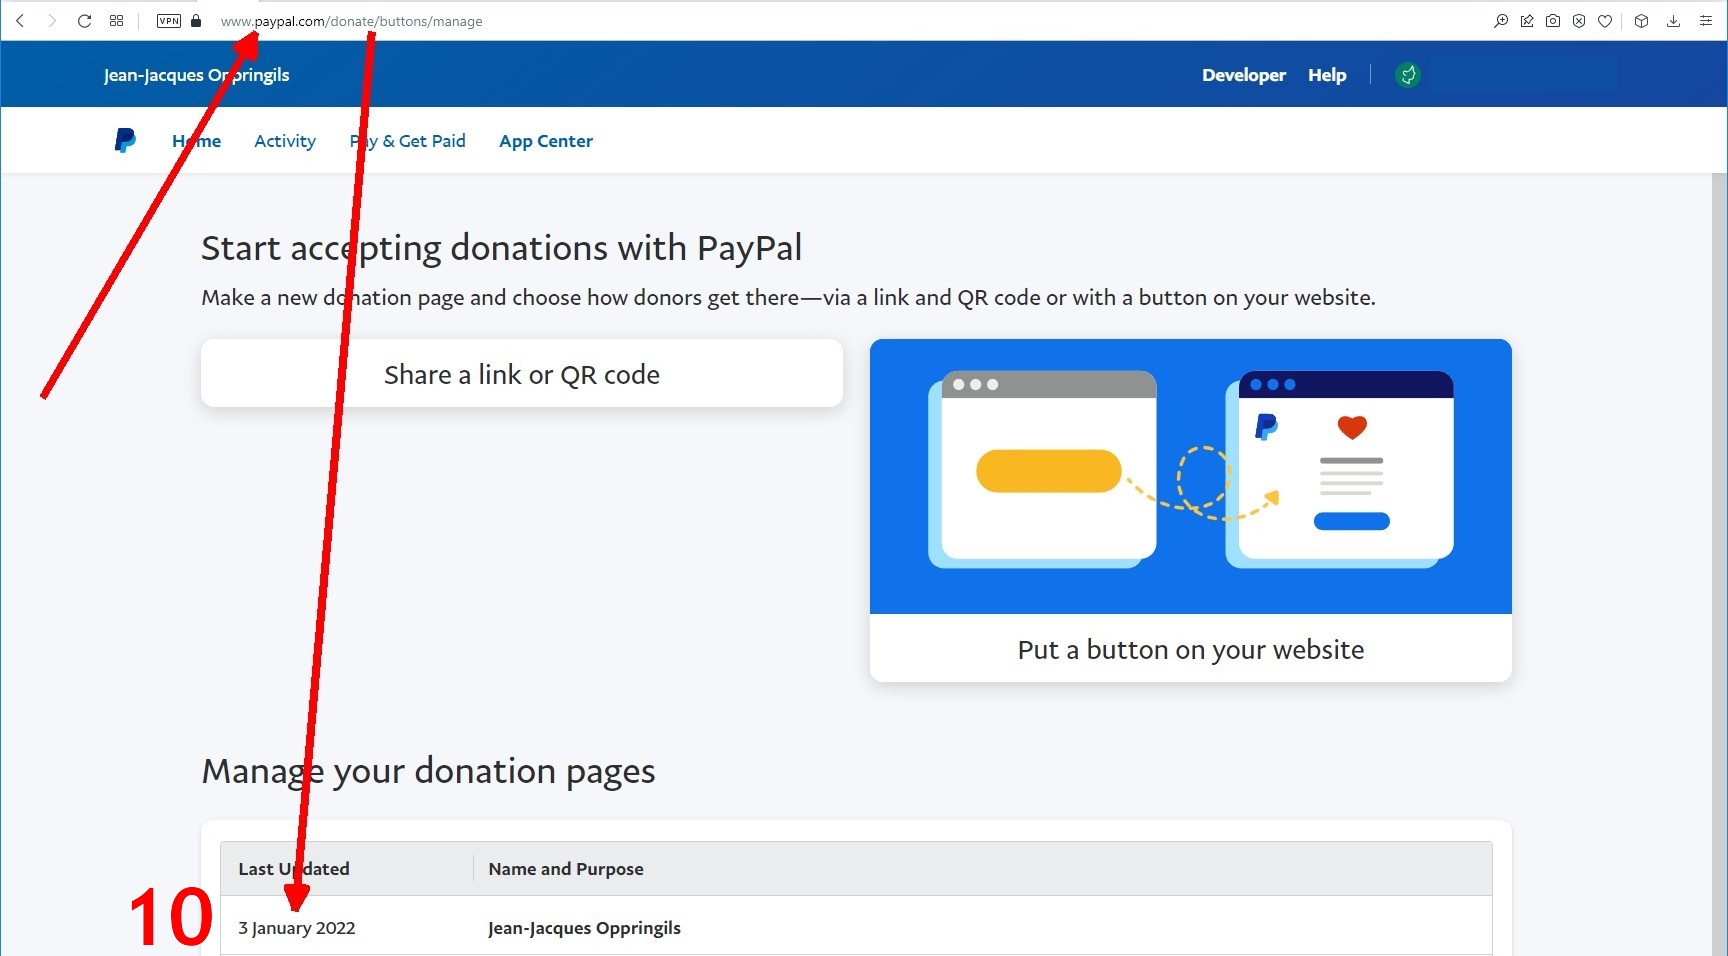
10) In the "Manage your donation pages" zone, click on the "Last Updated" donation item your have created (item "3 january 2022" in this example)
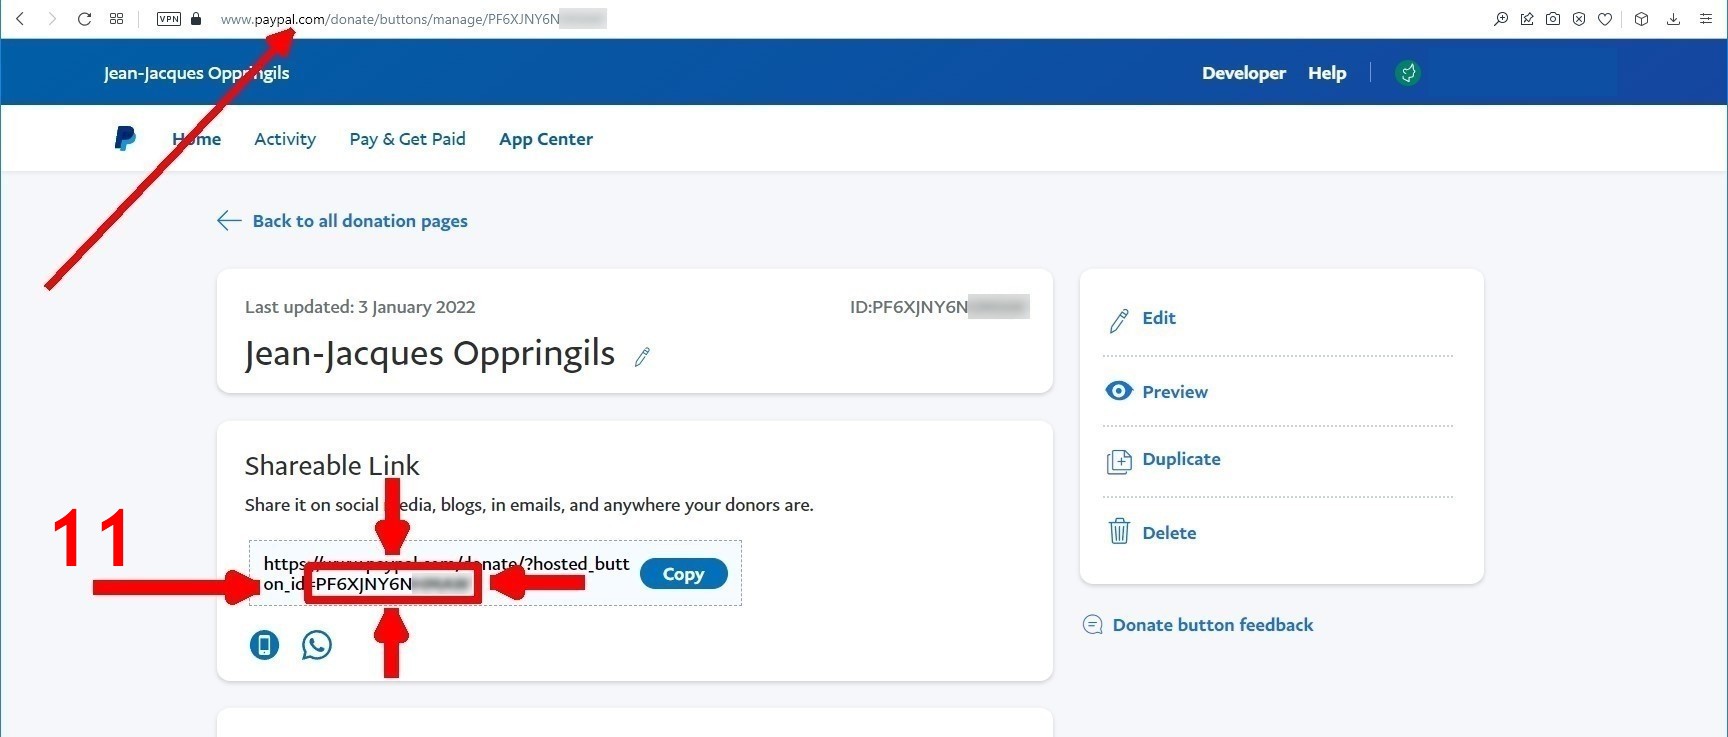
11) When all of these steps are done, the ID code above in this last screen copy and in the red box will be your "Paypal Donations Key (hosted_button_id)"
You need to copy it and paste it in the same zone in your ART Gallery parameters page ( see point 12 below )
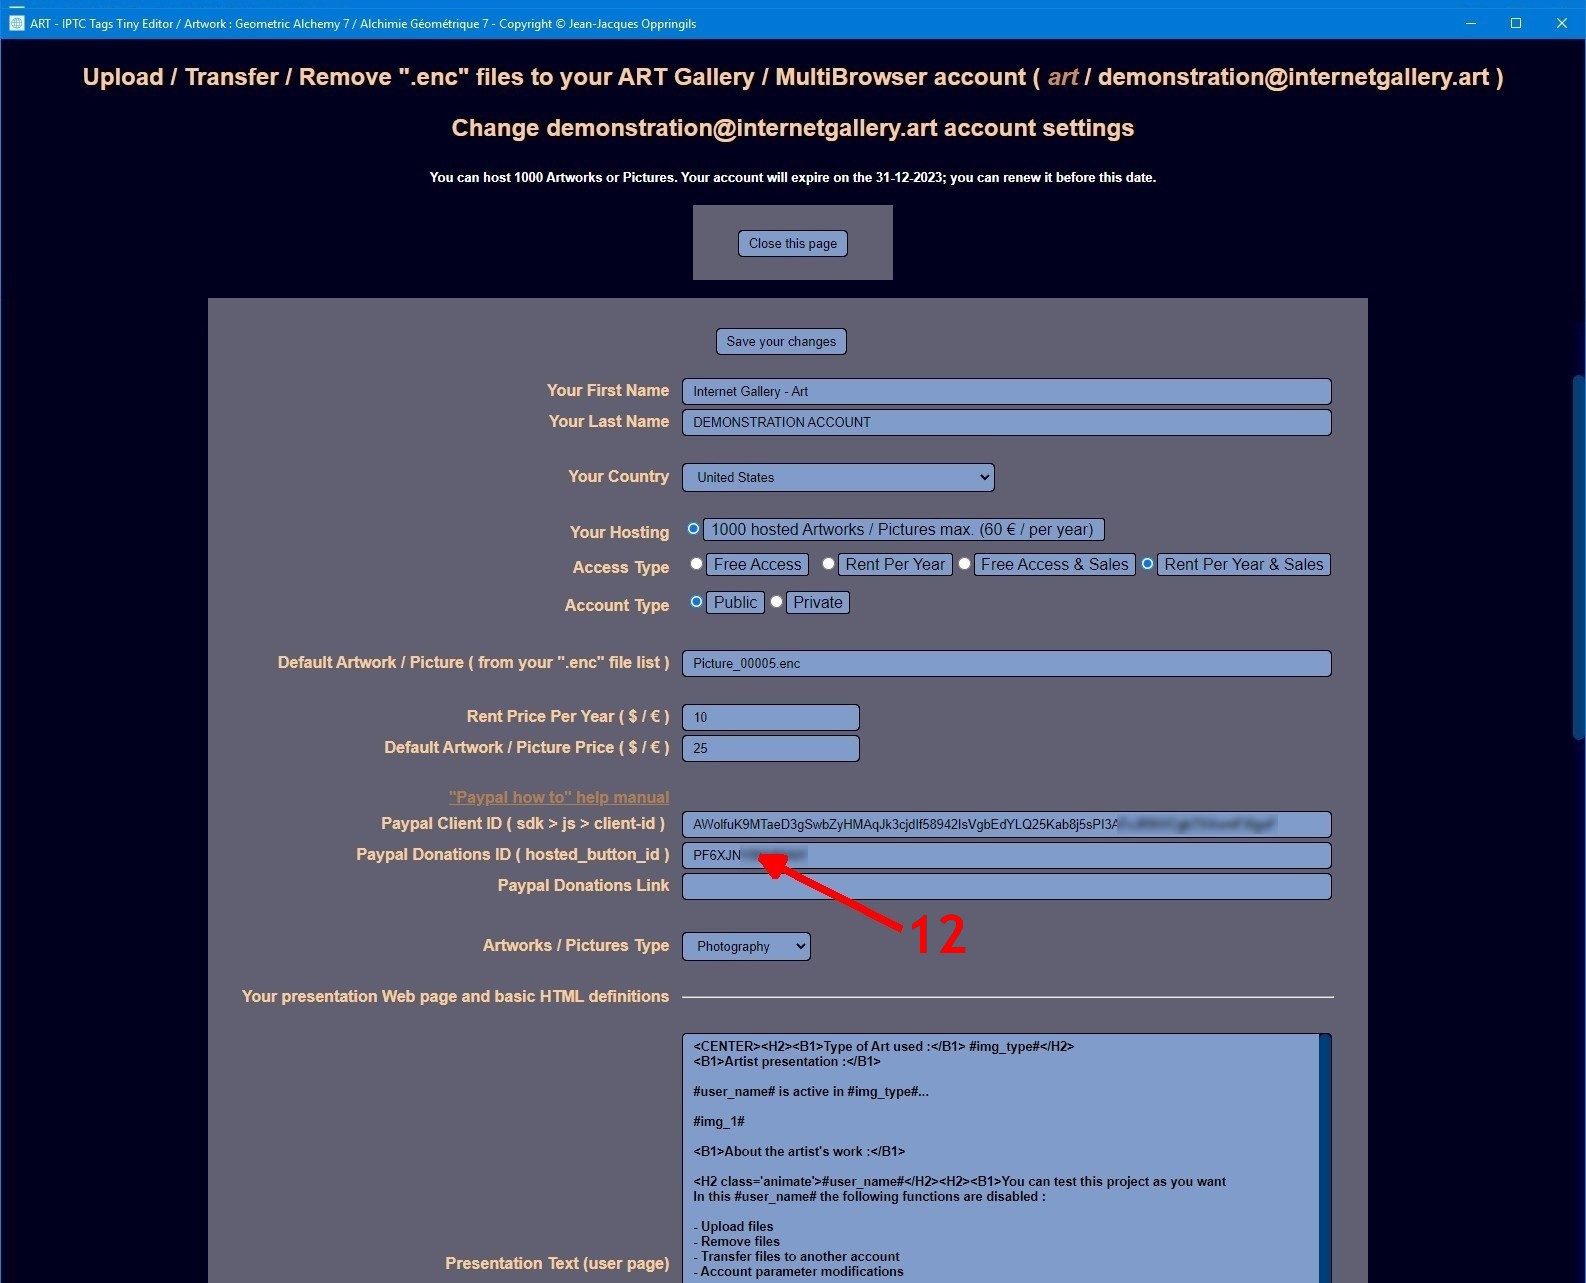
12)You need to copy your "Paypal Donations Key (hosted_button_id)" and paste it in this zone in your ART Gallery parameters page